



How to Restore Threads: The Kit and the Techniques
Sometimes it becomes necessary to repair a damaged mechanical thread. Because this structure, based on the interlocking of two spiral profiles, can often be damaged. The causes are different, both external to the operator and dependent on those who manage the various pins and bolts. What matters, however, is that there is a tool - the die - that allows you to restore and repair threads.
This is an operation known to mechanics professionals and workshop owners. Even those who dedicate themselves to DIY can attempt this operation, with a precaution: redoing the worn profile of a thread pin or hole means putting the mechanical resistance of the structure to a hard test. Often the balance will be changed and the durability can suffer. The synthesis of all this is extremely clear: you must be careful with critical applications - like on engines - where maximum strength is required.
Why Do Threads Wear Out and Get Damaged?
Let's start from the basics: we say that it's necessary to have the tools and skills to redo and reshape a thread. But first we must understand why the thread gets damaged. The reasons are different: first of all, there's a problem of intensive use, a bolt or a screw that is screwed and unscrewed continuously is prone to mechanical wear. And the thread can wear out.
The same happens when the profile is damaged by rust, oxidation, and dirt, which is why it's good practice to spray some penetrating oil on the thread to avoid excessive effort that leads to wear. One of the main causes of the problem?

It's excessive tightening force: often, especially where greater security is required, we tend to tighten with great force pins, bolts, and screws to prevent them from loosening. One example above all: the delicate prisoner bolts of an engine head.
In fact, a torque wrench would be needed to measure the appropriate tightening torque and mechanical self-locking systems, like lock washers. Too much force, instead, leads to wear and having to use your kit to repair these structures.
To learn more: how to extract worn screws
Tools for Restoring Threads
If you have a worn thread, you need to take action. How? First point: you need a tool to repair the mechanical spiral profile, we're talking about the die, a tool with an evocative name (generator of what screws) that is divided into two large categories of tools. On one side, there is the tap: it serves to restore the internal part that accommodates pins and screws.
- Roughing (one notch): conical, to begin the threading.
- Intermediate (two notches): deepens the groove.
- Finishing (no notches): brings the thread to its final size.
It is inserted into the hole and, turning, recalibrates the grooves. Then there's the die, also known as a bushing or nut: it's necessary for the external part (bolts or screws). It's a kind of sharp-edged ring that screws onto the screw shaft, turning cuts the metal and redraws the thread. All of this is facilitated by levers and ratchet wrenches that rotate the necessary tools.
How to Redo a Worn Thread
Let's move to the practical phase, the guide that explains how to solve the problem when it presents itself, in front of your workbench, a thread to be recovered because now the metal profile spins freely, the pin turns and the bolt no longer tightens.
Bushing
If the internal thread is completely smooth and the screw spins freely, just cleaning is not enough: you must reconstruct the pin profile. In these cases, the bushing or female die is used, which rotates around the metal axis to redraw the thread profile.
Clamp the pin in a vise, if needed protect the non-threaded part with rags or soft aluminum clamps to avoid marking the metal. Choose a die - that is the die, the bushing - corresponding to the original diameter and pitch: for example, M8 if the pin is 8mm. Then add cutting oil and proceed with the tool assembly: insert the die into the die holder.
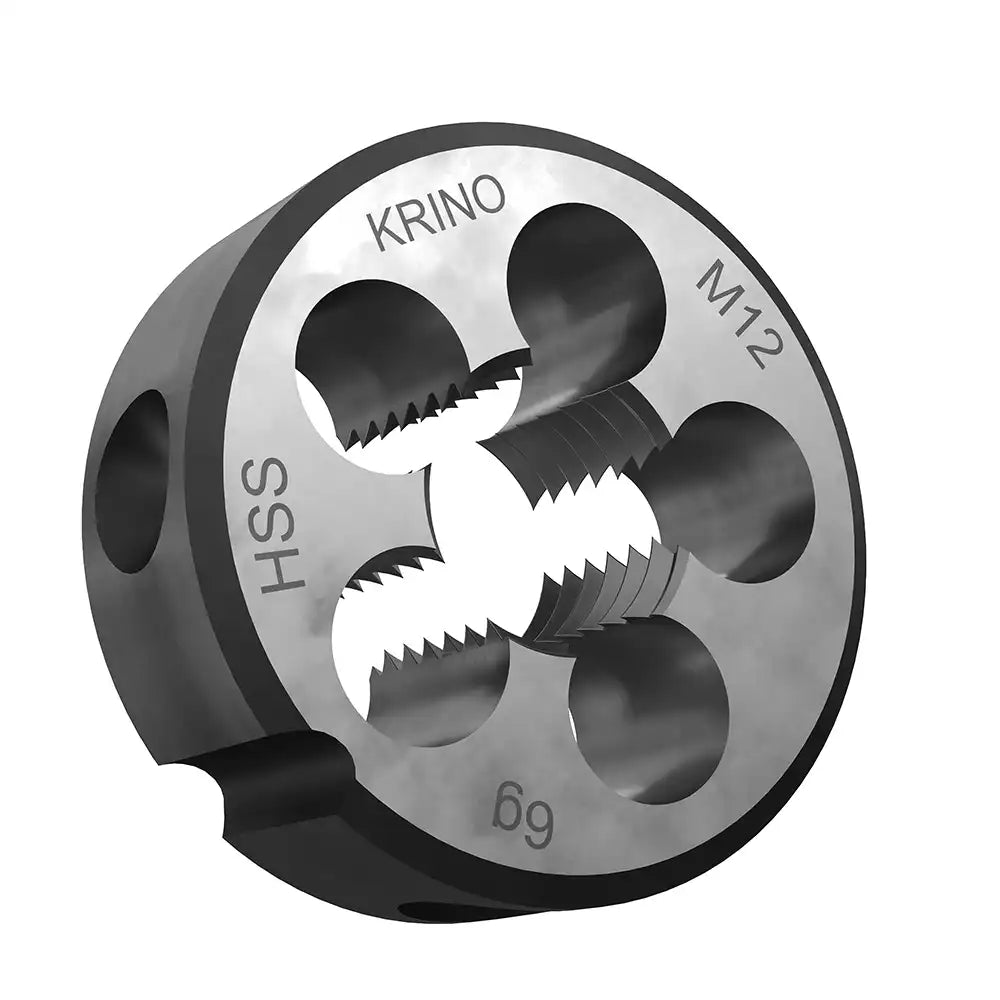
Secure it by tightening the side screws: these must engage in the recesses on the outer edge. Bring the die to the pin: the tool has a side with a more pronounced recess that must touch the pin first. All of this happens with the die holder perfectly perpendicular (at 90°) to the pin's axis. Press downward and start turning clockwise, proceed similarly to the tap: rotate forward about half a turn, you'll feel the resistance of the metal being cut. Then go back a quarter turn. Work done: clean the pin with compressed air or a rag to remove metal chips.
If the pin is not smooth, but only has the thread crests flattened, sometimes you don't need the die: you can use a thread file or, if you have space, try screwing a hardened steel nut starting from the healthy thread part and unscrewing it toward the damaged one.
Tap
Creating a thread in metal is not a simple operation. You must assume that it's a precision operation. If the thread is slightly damaged, you use a tap of the same size to clean it up and restore it without invasive interventions.
If the hole is completely smooth, you need to enlarge it because the old thread no longer exists. So you must drill the metal with a specific bit: the diameter is equal to the nominal diameter minus the pitch. For an M6 tap (1 mm pitch), you'll use a 5 mm bit.
Once the hole is rectified, get some specific cutting oil so you never tap dry, you'll break the tool. Now place the lubricated tap on the hole making sure it's perfectly vertical. If it goes in crooked, the screw will work poorly and won't hold the load.
Start turning slowly clockwise while applying slight downward pressure until the tap engages the metal. How do you manage the chip? With the technique of two forward turns, one backward. Turn clockwise about half a turn or a full turn (you'll feel the tap cutting). Go back a half turn: the metal chip breaks and falls into the tap's grooves.
Repeat the process until you reach the desired depth. If you only turn forward, without ever going backward, the chips accumulate. Then they jam the tap and break it inside the hole. And extracting a broken tap is a nightmare. Work finished? Clean everything with a blast of compressed air, perform the process also with the finishing taps and test with the screw.
To read: tips for buying taps and dies
A Few Tips to Avoid Redoing the Thread
The thread can be restored but it's always better to avoid damaging it. Small practical attentions are enough for those who know mechanics. First point: avoid screwing pins and bolts without first verifying that they are aligned in the hole's invitation. First check that the male and female threads match, then you can screw clockwise without risk.
Another decisive tip: never use the electric screwdriver or ratchet wrench for the first 3 or 4 turns, if the screw doesn't enter smoothly with your fingers, it means it's crooked. And if you force it with tools, you wear the mechanical profile, unless it's a properly calibrated torque wrench. If you work on delicate components (engine head, aluminum, bike parts), use this tool and remember that aluminum is much softer than steel bolts: it's almost always the hole that gives way if you overdo the force.
Last point to observe: lubricate and clean the thread from dust, dirt, and rust. What prevents the thread from sliding freely can also cause slipping of the parts and relative permanent damage to the metal profile.


